I was feeling a little uninspired with these boxes I got from a friend of mine. Probably because they had a newness look to them. They came off a homemade desk that I knew I wouldn't be able to sell at the shop so I decided to salvage what I could from the piece. These drawers were some of the items I kept from the desk and I knew eventually something would come to me. I never like to purchase anything without having an idea about what to do with it. When you get something for free you just have to go with it until it comes to you. Let the piece talk to you, well not really, wood can't talk.

My daughter Danielle had the idea actually of making display boxes. I have made these before using an old suitcase and those came out super cool. She remembered and suggested that I do the same with these drawers. Since I was the lacking energy to do anything too complicated I decided to make these drawers my project for the day. Yes you can build these in a day so as far as being difficult I would say not, it was actually very easy. The first step was to paint the outside of the box all sides with a dark brown paint and primer all in one sold at most hardware stores. I will tell you later why I did it brown.
Here is the drawer completely painted and left to dry in the sun. One coat is all that is needed especially if you are applying it to raw wood. I did give the top of the drawer a light sanding since the front had been sealed and protected. Do it if you see a shiny finish it helps with the paint adhering.
I decided to add a little spark to the drawer and apply some chalkboard paint on the inside of the box. I used it on all four sides and the back or bottom. I was thinking that in case they do get sold at one of the many markets I sell at another vendor who sells jewelry could put a price or description of the items inside the box. I used Rust-Oleum Chalkboard paint. I always give it three coats, ya I know overkill but I haven't had a return yet on any chalkboard anything I have sold.
Here is me applying the chalkboard paint, first coat. Work in the sun for best results. The paint on the outside has already dried and the chalkboard paint will dry in about 10 minutes. Add another coat and let dry, and if you are me sneak in one more coat. Since I was making two of these boxes I flipped flopped starting with one and then going to the other so they had time to dry.

The hardware store. Yes I do have one, actually not a Home Depot quality but my own little version of it. Here at my store "Restore & Rework" I hoard metal hardware. I have a weakness for the stuff, like drawer pulls, latches, door knobs, electrical covers, hooks and hinges. I am always searching for pieces to add to my collection. You know I am not the only one who likes it. I sell tons of the stuff out of the store. They have a million and one uses for artists and I can pull hardware out of these boxes as a project presents itself. I sell them for $3 each at the shop, but if you want to confuse me put a pile of them together the price gets better.
Here are my selections. A couple of window sash locks, a coat hanger and not sure on the other two. They had holes already and they had some extension to hang something on. The chipping paint adds to the hardware and rust I love too so I chose that one.
Measure about 3 inches to the top of the box and just make some marks with a pencil along the top all across. You want to do this to give the hardware some conformity. Don't worry you can erase any marks that you can still see after you install the hardware.
Place all the hardware on the dotted lines paying close attention to the aesthetics. Use a pencil to mark the holes you want to drill. I had a picture of this step but the camera was out of focus, sorry. Remove the hardware and drill the holes. If you want you can use a piece of wood on the other side before you drill to get a real clean cut on both sides. The back is not as important as the front but if you like perfection do it.
Since I try to use only recycled materials I have a ton of screws to choose from. I store them in these little jars. Nuts, bolts, nails and screws. I picked these up at an estate sales a few years back and I am still using them. I opted for the nuts and bolts. I could have went to the hardware store and made my job a lot easier but I knew if I did I would be supporting some overseas source so I decided to take the time and match the screws and bolts, it's what I do for you.

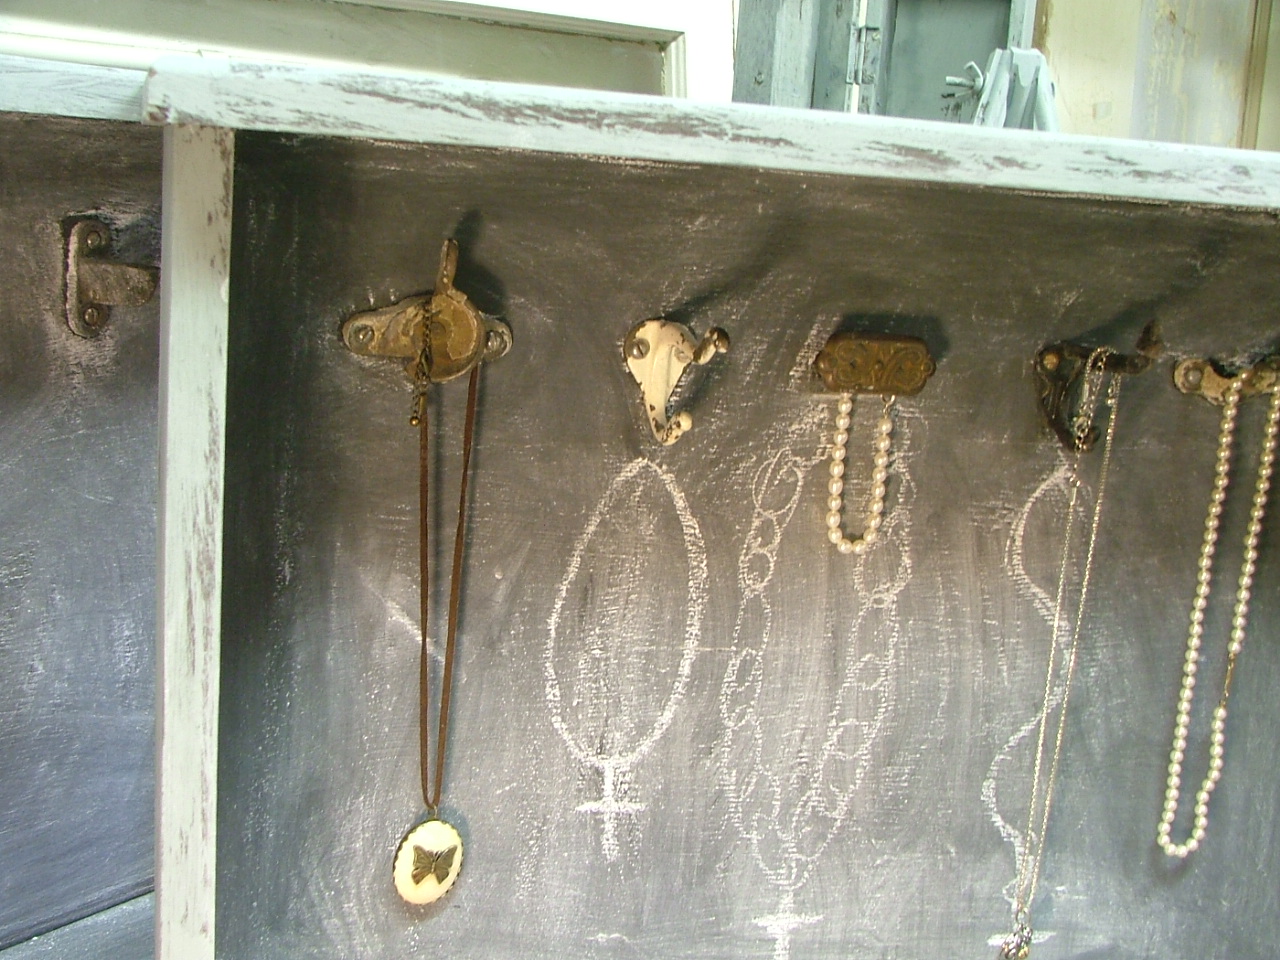
I did skip a few steps to get to this point the final product here they are. For one attach all the hardware piece by piece with the nuts and bolts. Get some chalk and mark up the entire inside of the box and then wipe it clean with a paper towel. The black paint will turn to this grayish color. Lastly paint the outside of the box all sides a contrasting color to the brown. Paint it with some mistakes, or use your left hand if your right handed you want to see the brown come through. I ended up using a CeCe Paint Seattle Mist. You can wipe it off with a wet towel to get the look you want.
Another close up of the box, I borrowed my wife's jewelry to hang inside the boxes. Guess you can hang just about anything, keys, collections or whatever. You could also hang these on the wall or just have them sit on top of a dresser or table.
By the way these are for sale in my shop for $55 each if you are interested. I don't think they will last long, all recycled and re purposed except for the paint. Send me a note if you do decide to make these on your own or need help or have further questions, happy building. Cisco